Saturday, July 13, 2013

New 1860s Corset

When planning out my summer sewing, I decided right away that the HSF Challenge #13 — Lace and Lacing would be a perfect opportunity for me to make a new mid-19th century corset. You can see my current corset in this post. It has served me well for almost 3 years, but it is starting to show its age. I never loved the fit that much to begin with — it doesn't have quite enough flare for my rather curvy hips, and sort of smooshes my bust instead of supporting it. Several of the bones, particularly the ones in the sides and back, have permanent bends in them where my hips jut out below the waist. And now, after years of dancing and sweating in it, the bones and busk are starting to show signs of rust. Time to make a new one!

My old corset is made from shaped panels; I knew I wanted the new one to have gussets instead. Many costumers out there on the internet have suggested that gussets provide better shaping for us curvier ladies, and my limited experience with them suggests this is true. My Edwardian corset gets much of its shaping from gussets, and that thing is not only curvalicious, but also gives me a smaller waistline than any other corset I've made, by a full inch! 

As for a pattern, I picked up Simplicity 2890 at a pattern sale a couple years ago, suspecting that it would be my next corset. It is a simple gusseted corset taken from a period pattern from 1867, and calls for single-layer construction, with flat-felled seams and minimal boning (only 6 bones aside from the ones at the back lacing and 4 short ones in the upper back). The corset has a fairly short and curvy shape, but I went ahead and added extra width to both of the bust gussets and the back hip gusset, just to be sure it would be curvy enough. I think I added about 1/2" to the curved side of each bust gusset (a total of 2" added to the bust circumference), and about 3/4" on each side of the back hip gusset (a total of 3" added to the hip circumference).

Aside from that, I did not alter the pattern at all, other than to change the rather odd method of boning that the pattern called for. I won't even try to explain what the pattern asked me to do with the boning, because I read it through once, didn't understand it, read it again, finally grasped what it meant, decided it was silly, and put the boning in the way I always do: bone casing tape applied from top to bottom along the placement lines. This straightforward approach meant that I needed bones that were on average 2" longer than what the pattern called for. Take note: if you decide to make this pattern, put it together first, decide whether you want to follow those silly instructions, and then buy your boning accordingly. 

Enough talking, here's the corset: 

Front view — I'm pretty happy with the shape and fit. The straight, tidy waist is particularly pleasing.

You can see a little more detail here. I'm hoping some of those wrinkles will smooth out as it stretches and forms to my body. 

The side view really shows how great the bust support is — a much more rounded, natural shape than my previous corset. 

See how much curve this corset gives in the back hip area?

I'm very happy with it. It's comfortable and pretty, and the shape is much better than what I was getting with the old one. I can comfortably lace almost an inch smaller at the waist than I could in my old corset (though I probably won't since I have so many dresses made at the larger waist measurement). 

The Challenge: #13 — Lace and Lacing

Fabric: White cotton coutil

Pattern: Simplicity 2890

Year: ca. 1867, but I will probably wear it for 1850s-1870s

Notions: 12" busk, 10 spiral steels, 4 white spring steels, 1/2" bone casing tape, 5 yd corset lacing, 5/8" twill tape for binding, size 00 grommets

How historically accurate is it? Aside from substituting steel boning for the whalebone that would have been used in the period, I would call this very accurate.

Hours to complete: maybe 7

First worn: will be worn at Costume College 2013

Total cost: The coutil was leftover from my Edwardian corset, so about $35 for the busk, bones, tapes, and lacing.

Thursday, July 11, 2013

Long Sleeves for Mrs. Bennet


Months after making my Regency muslin dress, I went back and sewed a pair of long sleeves that can be attached to the dress for daywear, just like the ones that go with the dress from Patterns of Fashion 2 I used as a modelI sewed the sleeves back in May for a Historical Sew Fortnightly challenge, but couldn't very well post about them without posting about the dress first. So here is my very late entry for HSF Challenge #10 — Literature: a pair of long sleeves for Mrs. Bennet.

I don't have a picture of them with the dress yet — this will have to do!


Like pretty much every woman I've ever met, I'm a huge Jane Austen nut. I read Pride and Prejudice more often than I would care to admit, and am well on my way to knowing the whole book by heart. When I set out to make my long sleeves, my mind immediately jumped to one of the rare instances when Austen alludes to fashion in the book. It's such a minor reference that many people probably wouldn't notice it, but it tickles me every time I read it. Mrs. Bennet is complaining to her visiting sister about the disappointment of her daughter Elizabeth's recent refusal of an offer of marriage:
“I do not blame Jane," she continued, "for Jane would have got Mr. Bingley if she could. But Lizzy! Oh, sister! It is very hard to think that she might have been Mr. Collins's wife by this time, had it not been for her own perverseness. He made her an offer in this very room, and she refused him. The consequence of it is, that Lady Lucas will have a daughter married before I have, and that the Longbourn estate is just as much entailed as ever. The Lucases are very artful people indeed, sister. They are all for what they can get. I am sorry to say it of them, but so it is. It makes me very nervous and poorly, to be thwarted so in my own family, and to have neighbours who think of themselves before anybody else. However, your coming just at this time is the greatest of comforts, and I am very glad to hear what you tell us, of long sleeves.”
The abrupt transition at the end of the speech, Mrs. Bennet's ability to be comforted by something so trivial as the fashion for long sleeves, shows us that her nervous distress over her unmarried daughters is just as superficial as most of her other worries and complaints throughout the book. She is thoroughly vain and silly, without a serious thought in her head. Every time I wear these long sleeves, I will try to remember to be a little more grounded and sensible than Mrs. Bennet. Here are the details:


The Challenge: #10 — Literature

Fabric: spotted white muslin

Pattern: adapted from Patterns of Fashion 2

Year: the dress these were patterned from is dated 1798-1804

Notions: white cotton thread

How historically accurate is it? Very accurate. The pattern was taken from an original garment, the fabric is very similar to original textiles, and they were sewn by hand. 

Hours to complete: 2 hours

First worn: Will be worn to some unknown future Regency event

Total cost: Cut from the leftover fabric from the dress, so a couple of dollars


Regency Muslin Dress

As I continue to play catch-up on blogging about my recent sewing projects, let's take a look at my Regency muslin dress:

Front 
(Yes, that's my blue late 1830s ballgown hanging in the back again. Anyone else have issues with costume storage?)

Back 

I made this dress back in February/March to wear to a Jane Austen ball, but never got around to posting about it. As I mentioned in my planning post, I based my dress on the 1798-1804 Morning Dress in Patterns of Fashion 2. When I scaled up the pattern, I found that the original dress was made for a tiny person, so I had to add quite a lot to every piece of the bodice to get it to fit me. 

Here you can see my pattern pieces with the tiny original pattern pieces on top (note that my pieces have seam allowance added, the original pieces do not):

You can see I had to enlarge the pieces quite a bit!

My fabric is a spotted muslin from Britex Fabrics. The bodice is lined with the same medium-weight linen I used for my Regency shift

I knew from the beginning that I would sew my dress completely by hand. My feeling was that the lightness and delicacy of the original muslin dresses could not be captured with machine sewing. Besides, I wanted to learn about the construction of garments from this period, and the particular way the seams are sewn would have been impossible by machine. I gleaned as much as I could from my costume books, and relied heavily on the various sewing techniques shared by Katherine at The Fashionable Past. In the end, it didn't take as long as I thought it would, it was very pleasant sewing, and the results were just as I hoped. I think I'll stick with hand-sewing for all my future Regency projects. 

I wore the dress over my shift and stays, along with a bodiced petticoat that I don't have photos of yet. I also wore my Pemberley shoes, a matching vintage taffeta ribbon as a sash, and some coordinating costume jewelry. 

Here it is in action:

Photo courtesy of Kim Yasuda (you can see more of her pictures from the evening here)

The dress was comfortable and easy to wear, though getting into it was not as simple as I had hoped. Pinning the bib in place was a real challenge, especially trying to keep the pins from showing on the outside. There was an aesthetic issue with the bib as well: the thin, sheer fabric, while very delicate and pretty, allowed every wrinkle and seam from my underpinnings to show through in the tight bust area. Was this just part of the look in the period, or should I re-make the bib in some way to give it more opacity? I am thinking some fullness and gathers would help a little. 

Also, the dress needs to be shortened before I try dancing in it again. It just grazes the floor when I move, which is very pretty, but not very convenient on a modern dance floor. At the ball, while I was being escorted off the floor after a dance, someone following too close behind me trod on my hem and pulled most of those tight gathers out of the back of my skirt! Luckily a kind stranger was able to pin me back together in the dressing room, but I learned my lesson. I think hacking off an inch or so will prevent that problem from occurring again.

Sunday, June 30, 2013

Clara the Barmaid Bustle Dress

I've been a very bad blogger! I haven't blogged at all in almost two months, and there are things I made months ago that I still haven't shared here. My only excuse is that I've gone from one big project to the next, and just haven't had time to stay on top of the blog. Sorry! The next few posts will be me playing catch-up.

First up, my Clara bustle dress:

Last month, I made my reproduction of the Victorian barmaid costume worn by Clara in last year's Doctor Who Christmas special (read more about the planning here). I threw it together in record time (about 2 weeks), and wore it to a Who-themed PEERS dance at the beginning of June. The ball was a huge success — it brought out a mix of swing dancers, fans of the show, and PEERS regulars that packed the venue, making dancing a bit difficult at times. Even though the dance floor was crowded, it was great fun. I danced with the Fourth, Fifth, Tenth, and Eleventh doctors, crossed my own timeline a few times, narrowly avoided some Daleks and weeping angels, and waltzed to a swing version of the show's theme music.

I am thrilled with how my costume turned out, though sadly, not very many people knew who I was. There were a couple of people who got it instantly, and quite a few who remembered with a little prompting, but I'm sure a lot of folks must have thought I had missed the memo about the theme and showed up in a generic Victorian showgirl-type costume. Nevertheless, even those people admired it, and the good thing about it being a bit generic is that I can wear it for other events in the future.

As a reminder of what I was copying, here is Clara's dress from the show:


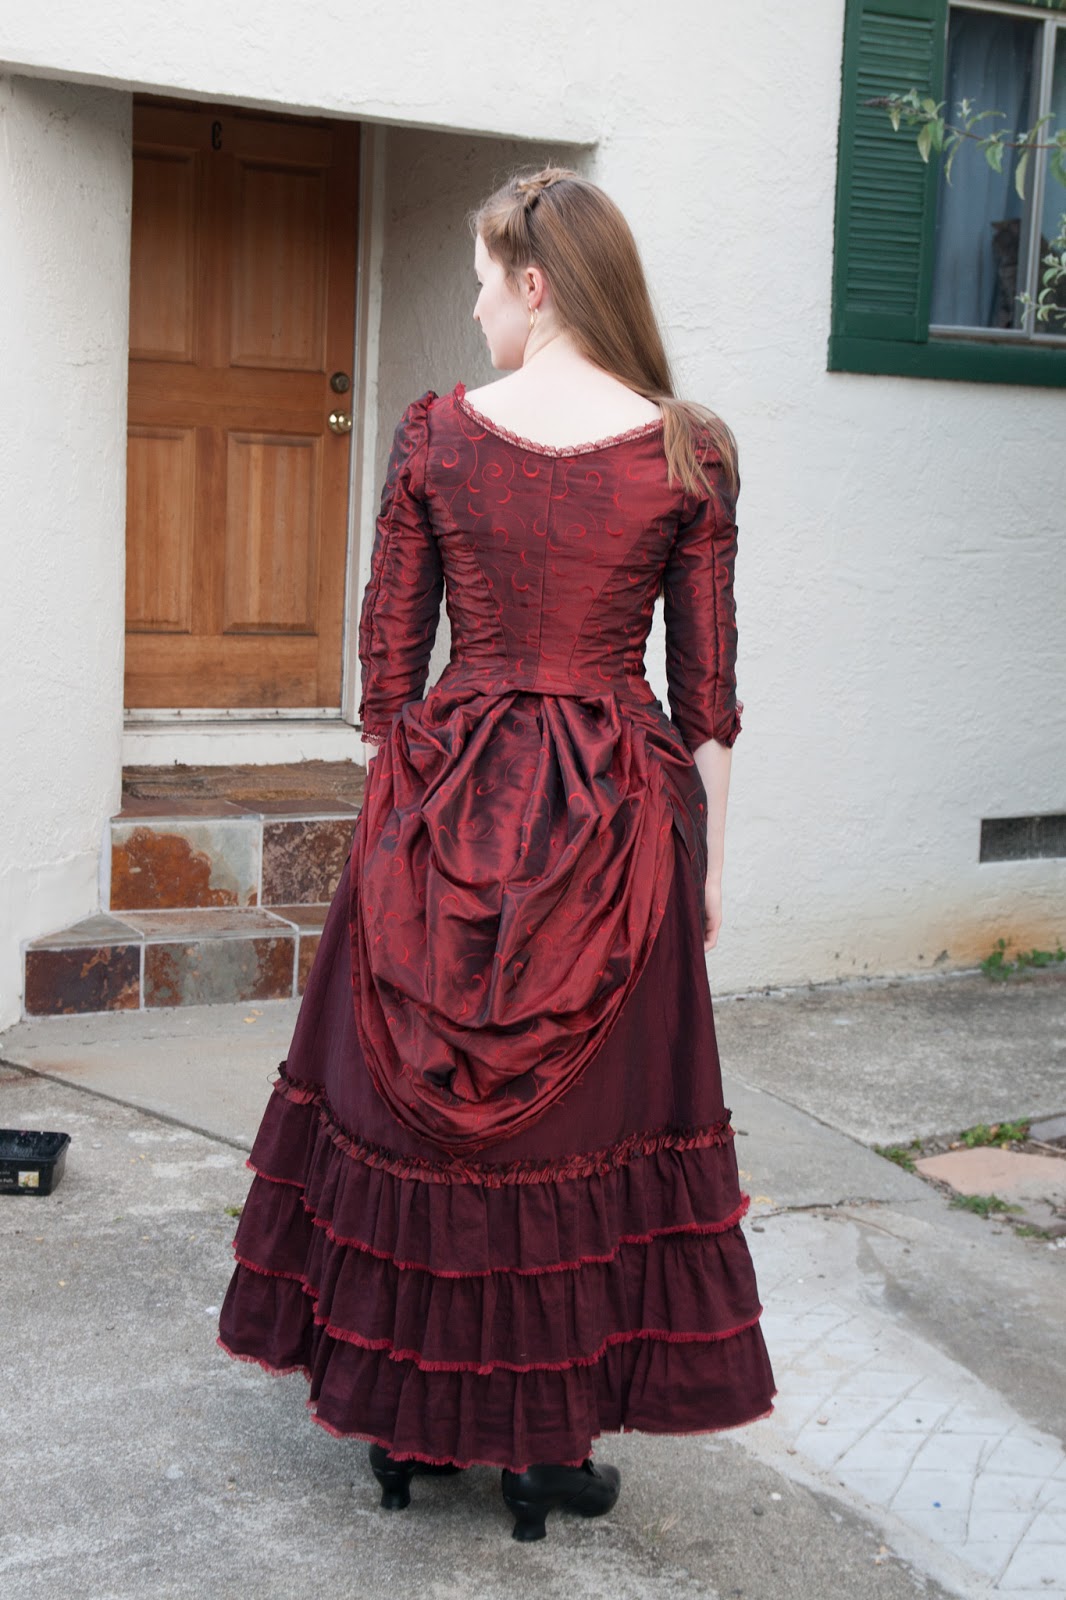
And here's my version:

Not bad, eh?

The skirt and overskirt are based on the 1886-87 skirt from Period Costume for Stage and Screen (pg 126-7). I shortened both layers a bit, and added three rows of ruffles to the skirt. The bodice is the TV460 1885 Cuirass Bodice. I used the square evening neckline, but with the 3/4 length coat sleeves.


I used a red Kona cotton as the base for the skirt, with the outer skirt layer made from a black/red cross-dyed cotton. The ruffles were cut on the straight of the grain and fringed along the bottom edge, which is how they appear to be finished on the original costume. The top ruffle is accented with a ruche of the overskirt fabric.


The overskirt and bodice were made from an iridescent, embroidered polyester curtain fabric. Unfortunately, it was the only thing I could find to approximate the brocade used for Clara's costume on the show. It was an unpleasant reminder of why I never sew with synthetics — it was a pain to sew and press, and made me very hot and sweaty while dancing. It was a necessary compromise, however, and all things considered, looked pretty fabulous.


I trimmed the neckline and sleeves with a dark red lace trim, and used black vintage glass buttons along the center front opening.

I had intended to knit a screen-accurate shawl to go with the dress, but I got about two-thirds of the way through the knitting, when my right wrist gave out. It hurt so severely that I had to give it up and do without. In fact, over a month later, it is still giving me problems. No more knitting for me! Luckily, I found a second-hand chenille knitted scarf in a similar color that was close enough. It ended up not mattering much, because the dance was too hot and crowded to wear a shawl anyway. I left the chenille scarf in the dressing room for most of the night.

My American Duchess Tavistocks, while not exactly screen accurate, looked great with the dress and were surprisingly comfortable to dance in.

Altogether, I think this dress was a success. I'll keep it in the closet in case I ever need to attend an event as an 1880s saloon girl!


Sunday, May 5, 2013

Clara Dress Planning

So I have a confession: I'm a big fan of Doctor Who. I got started on it a couple of years ago by a friend, and now I'm hooked. I love it for all its cheesy plotlines, silly special effects, and all-around campy goodness. The characters are surprisingly well-developed and it appeals to my general anglophilia.

Imagine my delight when I found out that PEERS is hosting Doctor Who-themed ball this summer: The Doctor Dances. The ball is set in London in 1941, so either 1940s dress or Doctor Who inspired clothing is appropriate. At first I wasn't certain which direction I would go in, but after viewing the Christmas special in December, I had a clear vision: I would make one of the 1880s dresses worn by Clara, the Doctor's new companion, in The Snowmen. 1940s is not an era I have any experience in, so something Victorian would be more my speed.

At first I thought I would make the beautiful and formal day dress she wears through most of the episode, when she is working as a governess to two children:

Clara on the left — I love this dress. It's elegant and graceful, and rather historically accurate for a popular TV show!

The more I thought about it, however, the more I was worried about dancing in this dress. The long sleeves and high neck don't allow for ventilation, and the whole thing feels a bit too buttoned-up for a ballroom. Luckily, this isn't the only dress Clara wears in this episode. In the beginning of the show, she moonlights as a barmaid in this spicy red number: 


Much more suitable for dancing, no? Lower neck, shorter sleeves, and though you can't tell in this picture, the hem sits about 6" off the ground. Perfect for swirling about in a ballroom!

The dress appears to be 4 separate components: the scarlet brocade bodice, a matching draped overskirt,  a dark reddish-brown ruffled base skirt, and a red underskirt. I plan on using TV460 1885 Cuirass Bodice as my pattern for the bodice, and an assortment of diagrams in books for the skirts. I'm also knitting the shawl (there's a minor plot point involving it — it would be a shame to leave it out), and I'll wear my new American Duchess Tavistock button boots with the ensemble.

This is my first time attempting a close replica of an existing costume or gown. I'm already enjoying the process immensely. I've been researching and planning for several weeks, and I've managed to find all the necessary materials The sewing should be quick and easy — I'll post again soon once I've made some progress!


Wednesday, May 1, 2013

Gibson Girl Gown — Complete!

And now, the moment you've all been waiting for... the finished dress!

Front

Back

Bodice Closeup

Details

The shoulders — my favorite part of the dress


It's a shame the colors are so washed out in all these pictures, but I figured you would rather see the dress on me in a beautiful ballroom than on a dressform in my messy living room. 

Since you last saw the skirt, I added oodles of trimming. For the bottom flounce, I used a doubled piece of pink chiffon. I decided to make the flounce double width, then fold it in half, gathering the two edges and stitching them down as one. This approach had two advantages: I didn't have to hem yards and yards of silk chiffon, and the flounce was then more opaque. Easier and prettier at the same time!

I added a row of the beaded trim to cover the raw edges of the chiffon. I still had a bunch of the trim left over, so I decided to arrange the rest in a sort of branching cascade down the left front of the skirt. I then accented the whole thing with more roses made with the pink silk. 

Lastly I added a belt of black velvet to the bodice, in order to provide a bit more definition to the waist. 


The dress was very well received at the ball, and was a joy to dance in. The short length made it easy to move in, it didn't take up as much space on the dance floor as the mid-19th century dresses I usually wear, and the sleeveless design gave me much more range of motion than I am used to having in Victorian fashions. 

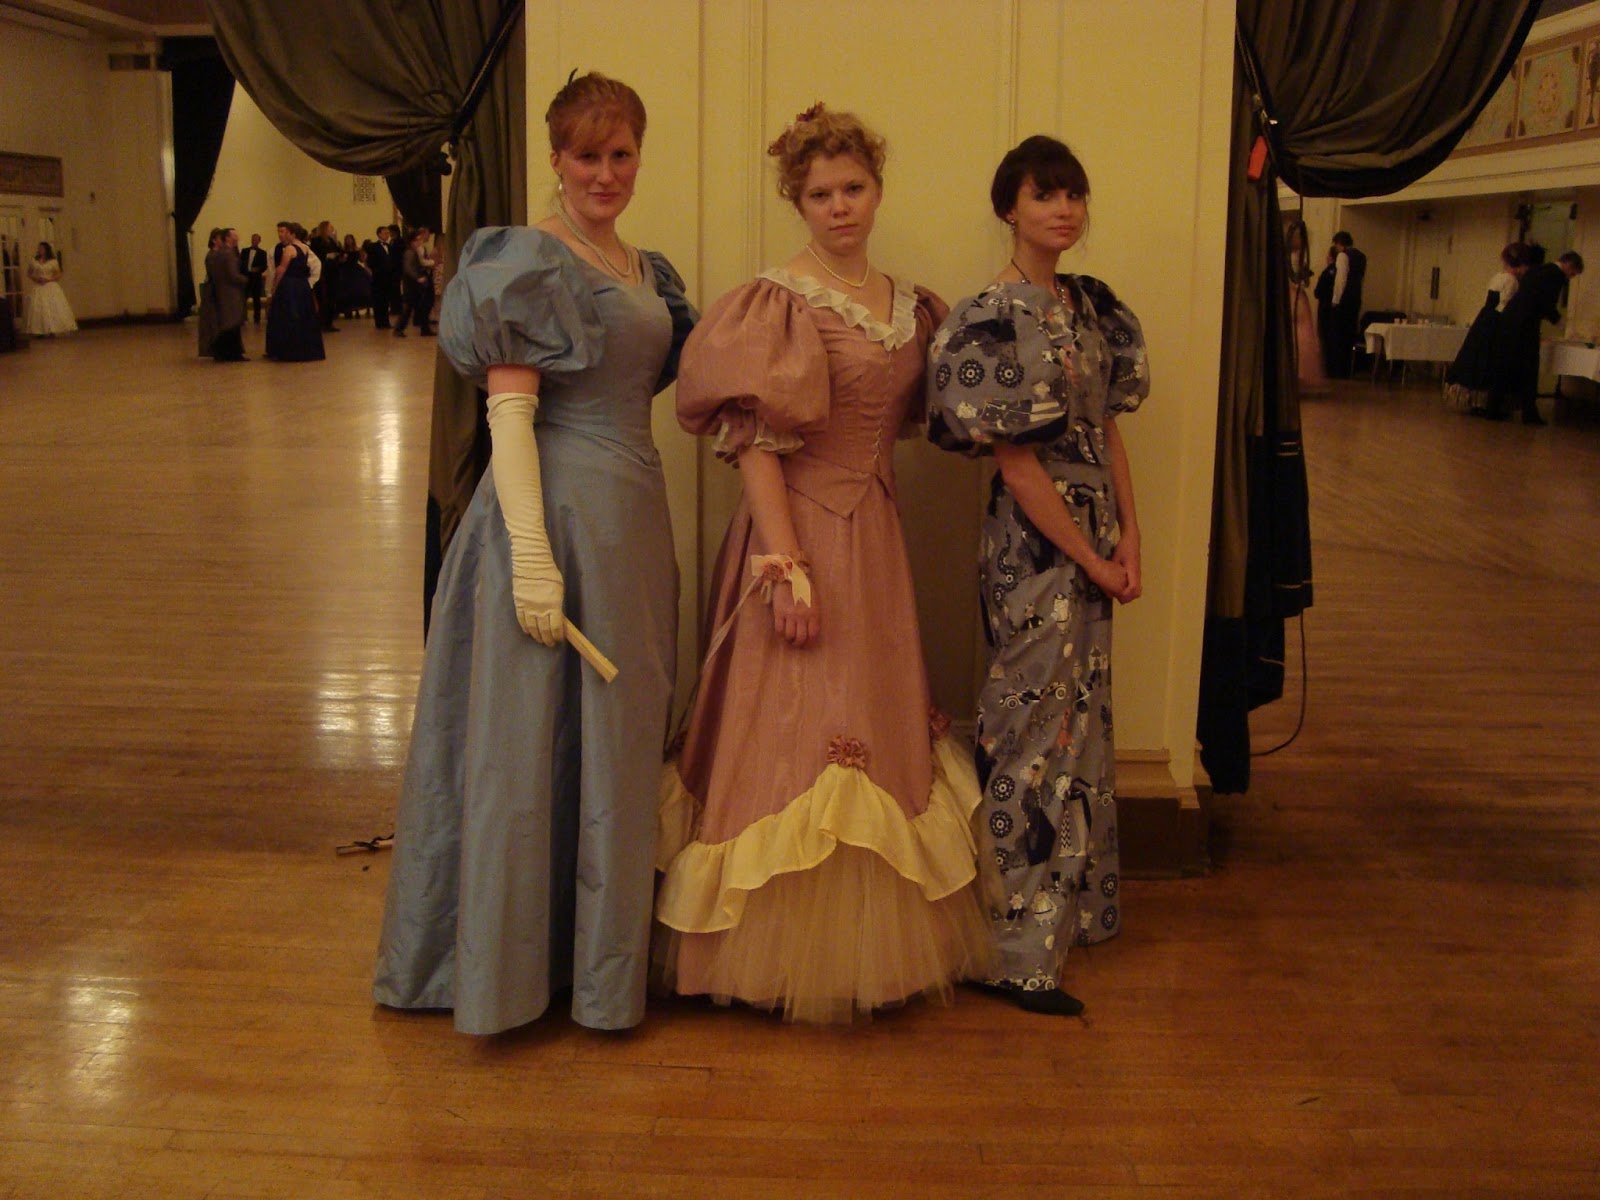
The group of ladies who inspired this project, my lovely Gibson Girls, all did a wonderful job with their dresses as well. We all had a great time! Here are a few pictures of the group:

Quite a variety of colors and styles

Showing off our shoes and petticoats

Three ladies who chose a slightly earlier silhouette: Jenny, Elizabeth, and Christine look fabulous with their floofy sleeves!

Vivien's trained dress was a show-stopper.

I love the silhouette from behind! (Read more about it on her blog.)

This was my favorite moment of the night: Jenny and Gregory recreated a charming drawing by Charles Dana Gibson.

Tells quite a story, doesn't it?


Another great victory of the night was my hairdo. After several rounds of trial-and-error, I figured out how to wrangle my fine, wispy hair into some semblance of a Gibson pouf. It took a lot of teasing, quite a pile of pins, and more than a few rats, but the results were better than I expected. 

The completed hairdo before the ball...

...and the tangled, messy aftermath! 


Here's a bonus: the decision to cover the dress in all those pink roses meant that this could become my entry for the next challenge in the Historical Sew Fortnightly! Here are the details:


The Challenge: #9 — Flora and Fauna (This is certainly the most floral dress I've ever made — 37 blooms from top to bottom!)

Fabric: Blue-green silk taffeta for the dress; pink chiffon, rosy pink silk taffeta, and black rayon velvet for trim; and pink acetate taffeta for the lining

Pattern: 1898 bodice from Period Costume for Stage and Screen as the base for my bodice, everything else was draped on the dressform

Year: ca. 1900

Notions: tarlatan for the hem, seam binding to finish the bodice inside, steel boning, petersham for waist stay, hooks and eyes, snaps, purchased beaded trim

How historically accurate is it? Fairly. It was inspired by period dresses in museum collections as well as period fashion illustrations. My techniques were based on period examples and period dressmaking manuals. My materials were pretty good (I used acetate taffeta for the lining where it should have been silk, and my velvet was a rayon blend). I used a purchased beaded trim instead of lavishly embroidering the dress as Worth would have done, because I am not crazy. Even with a few shortcuts, the majority of the sewing was done by hand, as it would have been done in the period. I would say 8 of 10. 

Hours to complete: I didn't keep track but my best guess would be upwards of 40.

First worn: to the Gaskell Ball on April 27, 2013

Total cost: I didn't keep track of this either, but my guess would be about $250. I overbought on most of my fabrics, meaning I have lots of leftovers that will be used for future projects. 


I'm very happy with how this dress turned out, but I'm even happier to be finished with it. Now I can move on to my next project, which will be something completely different... Details to follow!

Bodice Drapery

Time for some much-delayed updates on the Gibson Dress. For those of you who don't know, I finished it and wore it last weekend. It turned out just the way I wanted it, and it was very fun to wear.

Before I show you the finished pictures though, let's talk a little bit about the bodice. Last time I wrote about the bodice, I had completed the lining/base:


From this point, everything was draped on the dressform and sewn in place by hand.

I started by draping my blue silk on the bodice base to determine its final placement. I marked the outline of the area it would cover, tracing the area that would be exposed at the neckline, then removed the fabric from the bodice base. I then carefully filled in the neckline area with bias pieces of pink chiffon, pleating it gently and tacking it into place.

Here's a photo of what the bodice neckline looked like after this step:


I repeated the same process for the bodice back:


Next, I sewed bias-cut strips of black velvet onto the straps, pleating them slightly to add texture over the shoulder.

Here's a photo of what they ended up looking like in the back (the picture I took from the front turned out very blurry):


From here, I was so absorbed in what I was doing that I forgot to take step-by-step progress photos. Sorry!!

I pressed all the blue silk bodice pieces, then draped them into the bodice base starting with the back. I smoothed the back piece over the base while it was on the dress form, pinning it carefully around the edges. I then basted it in place at the side seams and wrapped the bottom edge inside the bodice base, basting it in place as well. I left the top edge pinned until I attached the beaded trimming, then sewed the trim down through all the bodice layers. Here is how the back turned out:


I repeated a similar process for the left side of the bodice, except that I folded the edge under at the side seam, and slip-stitched it down over the basting stitches on the bodice back. I turned the center front edge under and whip-stitched it to the front edge of the bodice base, then turned in the bottom edge, basting it inside the bodice base.

The right front was draped in a similar fashion, but instead of attaching it at center front, I left it loose to continue across the body. I pleated this drapery so that it would fall in gentle folds across the lower bodice area, ending at the left side seam. I finished the bottom edge of this drapery piece by interlining it with a bias strip of tarlatan, folding up the bottom edge of the silk, and catch-stitching it to the tarlatan. I folded under the end of the drapery and stitched it neatly in place. It closes at the side seam with hooks and thread bars.

Once all the drapery was in place, I sewed a band of my beaded trimming along the top edge of the right side drape, from the top corner just underneath the velvet strap, all the way to the left side seam.

At this point I started adding some of the roses I made out of my dusty pink silk to the left shoulder area. Here's the front at this point:


Lastly, I added some little drapey pieces of the pink chiffon to the shoulders, then put on a few more roses for good measure. 

The completed bodice:


Next up, the skirt trimming and the finished dress!!